
Back, Back it up.
Wedding Photographers, commercial photographers, adventure photographers, all have one thing in common, we all have gigs and gigs of precious photos we don't want to lose.
First, before we get started I'd like to state two things:
This is A WAY to back up your work, I'm not saying its the ONLY WAY, everyone has their own idea of the proper way to do this whole thing, but this a system that's worked for me, and I have yet to lose any files since starting my career *knocking on all the wood*. If you're doing things your way and that's been working for you, then hey that's really cool, this is for those who can't quite get how hard drives, files, words like RAID systems and all that jazz.
Shouts to my friend Jenna Routh for being the instigator for this post.
One more note, this is the money conscious way, if I had $2700 to drop on an amazing 6 drive RAID system I would, but most of us, try to not do that.
Okay one last note, this entire posts revolves around using Time Machine on mac, if you don't have a mac, then this might not be for you, who knows you might find something important in here that you might have not known otherwise.
Time Machine, is a cute little software Apple has included into their OS which makes backing up your computer easy peasy lemon squeezey. Just plug in your drives, and choose them as your back up devices and hit OK. Time Machine will do the rest, it will even give you hourly backups for the past 24 hours, so if yesterday between 2 pm and 3 pm you accidentally deleted something you can go back and find it. It also makes straight up clones of your drives, so if your internal drive goes out, then no worries you have two EXACT other copies waiting for you.
Step one, know the difference, it will save you money.
This a back up system for daily use, aka this is a setup to back up your internal drive daily, so that at the end of the day you can fall asleep knowing all the precious images you have been pouring hours into are not going anywhere.
This is not an archive, that blog post is coming soon.
Now for some definitions:
RAID - "RAID (redundant array of independent disks) is a data storage virtualization technology that combines multiple physical disk drive components into a single logical unit for the purposes of data redundancy, performance improvement, or both." - thanks Wikipedia.
HDD- Hard Disk Drives, are now considered the old school hard drive, they have a disk in them that they literally write data to which makes a bit of noise, this is the part of your laptop that gets super hot. They also get slower the more data they have on them which makes them annoying for archiving. The higher their RPM the more keen they are to fail, as rare as that is. They're also 1/5 the price of an SSD.
SSD - Solid State Drives are a newer type of hard drive, they don't have the pesky disc which means no moving parts which means quieter drives, faster, and they're more reliable because they don't need to be run. These are great for an archival system because you don't need to worry much about have a 5 tier redundancy and more like a 2 tier.

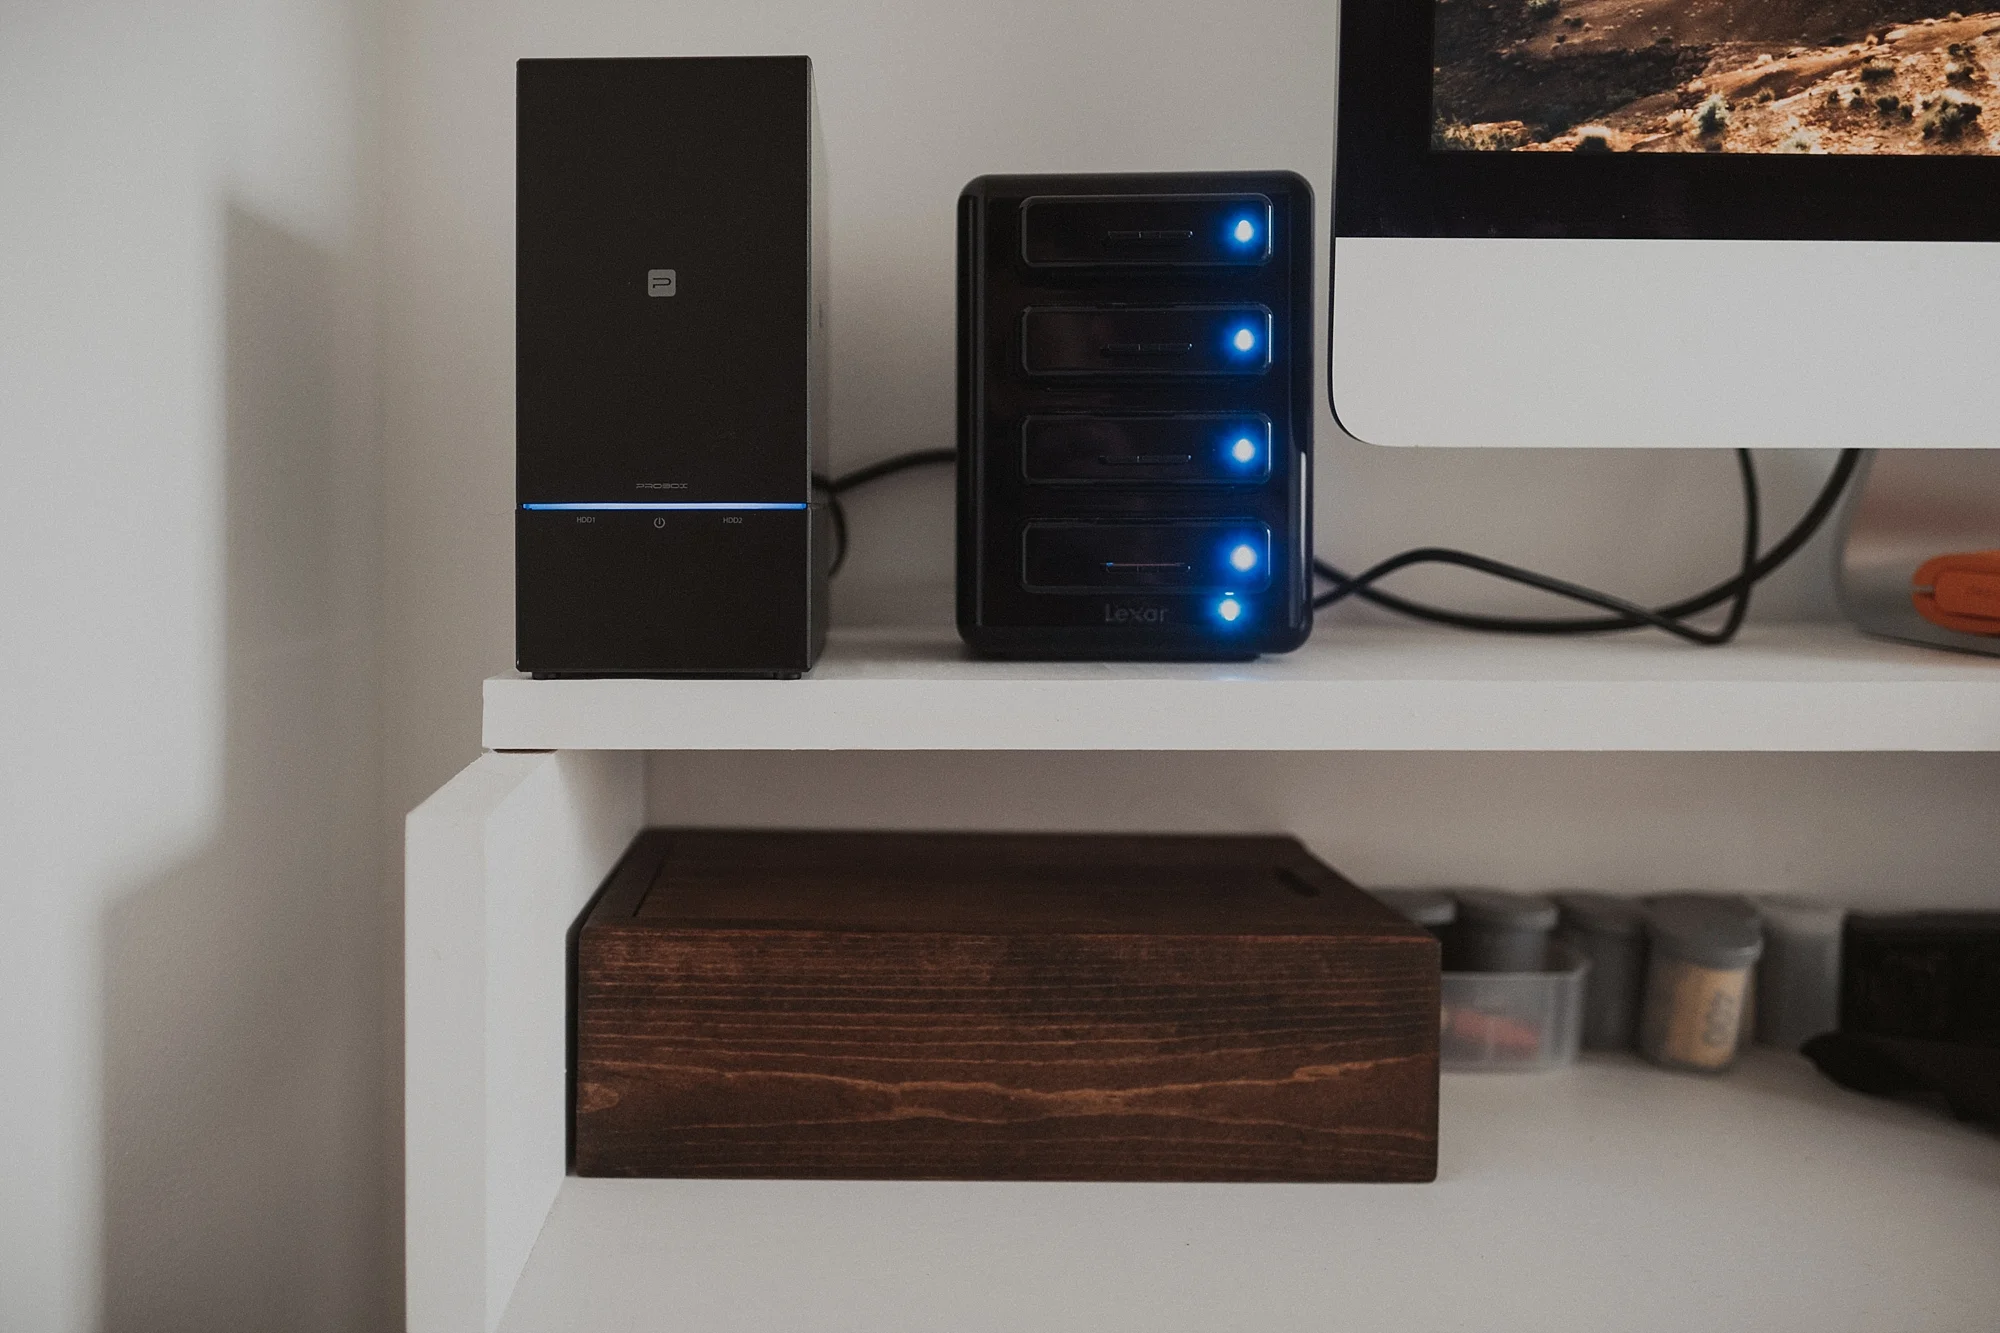
This is hard a drive enclosure, a house for the sensitive drives. While there are many, many, many enclosures and most are good choices this one is called, Mediasonic ProRaid USB 3.0 2 Bay 3.5 inch SATA Hard Drive Enclosure it's only $50 and has been super reliable.
Inside it are two of these: WD Blue 1TB Desktop Hard Disk Drive - 5400 RPM SATA 6 Gb/s 3.5 in. They've been great, and reliable. But the thing about this system is you can use whatever hard drives you want. Just make sure it's at least as big in storage size as the drive inside your computer.
So how do you choose? Well, let's make sense of this.
The system backs up your files once a day, most likely while you're sleeping, so we don't need to worry much about it's speed. All the files you're currently working on should also still be on your SD cards, so with this system, your raw files are existing in four different places. Having a brand new Ferrari of an SSD just doesn't seem to be that important. So the more bang for you buck option seems like the wiser choice, but it's honestly down to your budget, and your personal preference.
Now just plug in your drive, and open time machine, select the two drives and youre good to go.
Here's how to that:
To use multiple drives with Time Machine
- Connect your enclosure to your Mac.
- Click on the Time Machine icon in the menu bar, then click on Open Time Machine preferences.
- Click Select Disk.
- Select the drives you want to rotate, then click Use Disk.
- Time Machine will ask you if you want to replace your existing Time Machine drive, or use both drives. Click Use Both.
Time Machine will now back up to each individual drive within the enclosure
Now let's take this idea further, part two of his post if you will.
Photo Mechanic is a software designed for image file handling. Most people use it for it's primary purpose of sorting, and culling RAW images of SD cards because it's so quick.
That's a fantastic and proper use, but you can also make PM work for you more, by using it's ingest feature to back up all your cards.
Ingesting - Photo Mechanic's term for backing up, the ingest function will take all your SD cards and organize, and clone them for you, automatically. You can even tell it to put the backups in two separate places, for example two external drives separate from your backup system.
Take ingesting even further, with this.
This is the Lexar Professional Workflow HR1 Four-Bay USB 3.0 Reader Hub right now it's about $50 on amazon, the beautiful thing about this is a hub and you can get different terminals for your use, I have mine set up with four SD card readers. You can even have it set up with a 512gb SSD if you're feeling extra.
A newer version of the hub, with thunderbolt capability is available here.

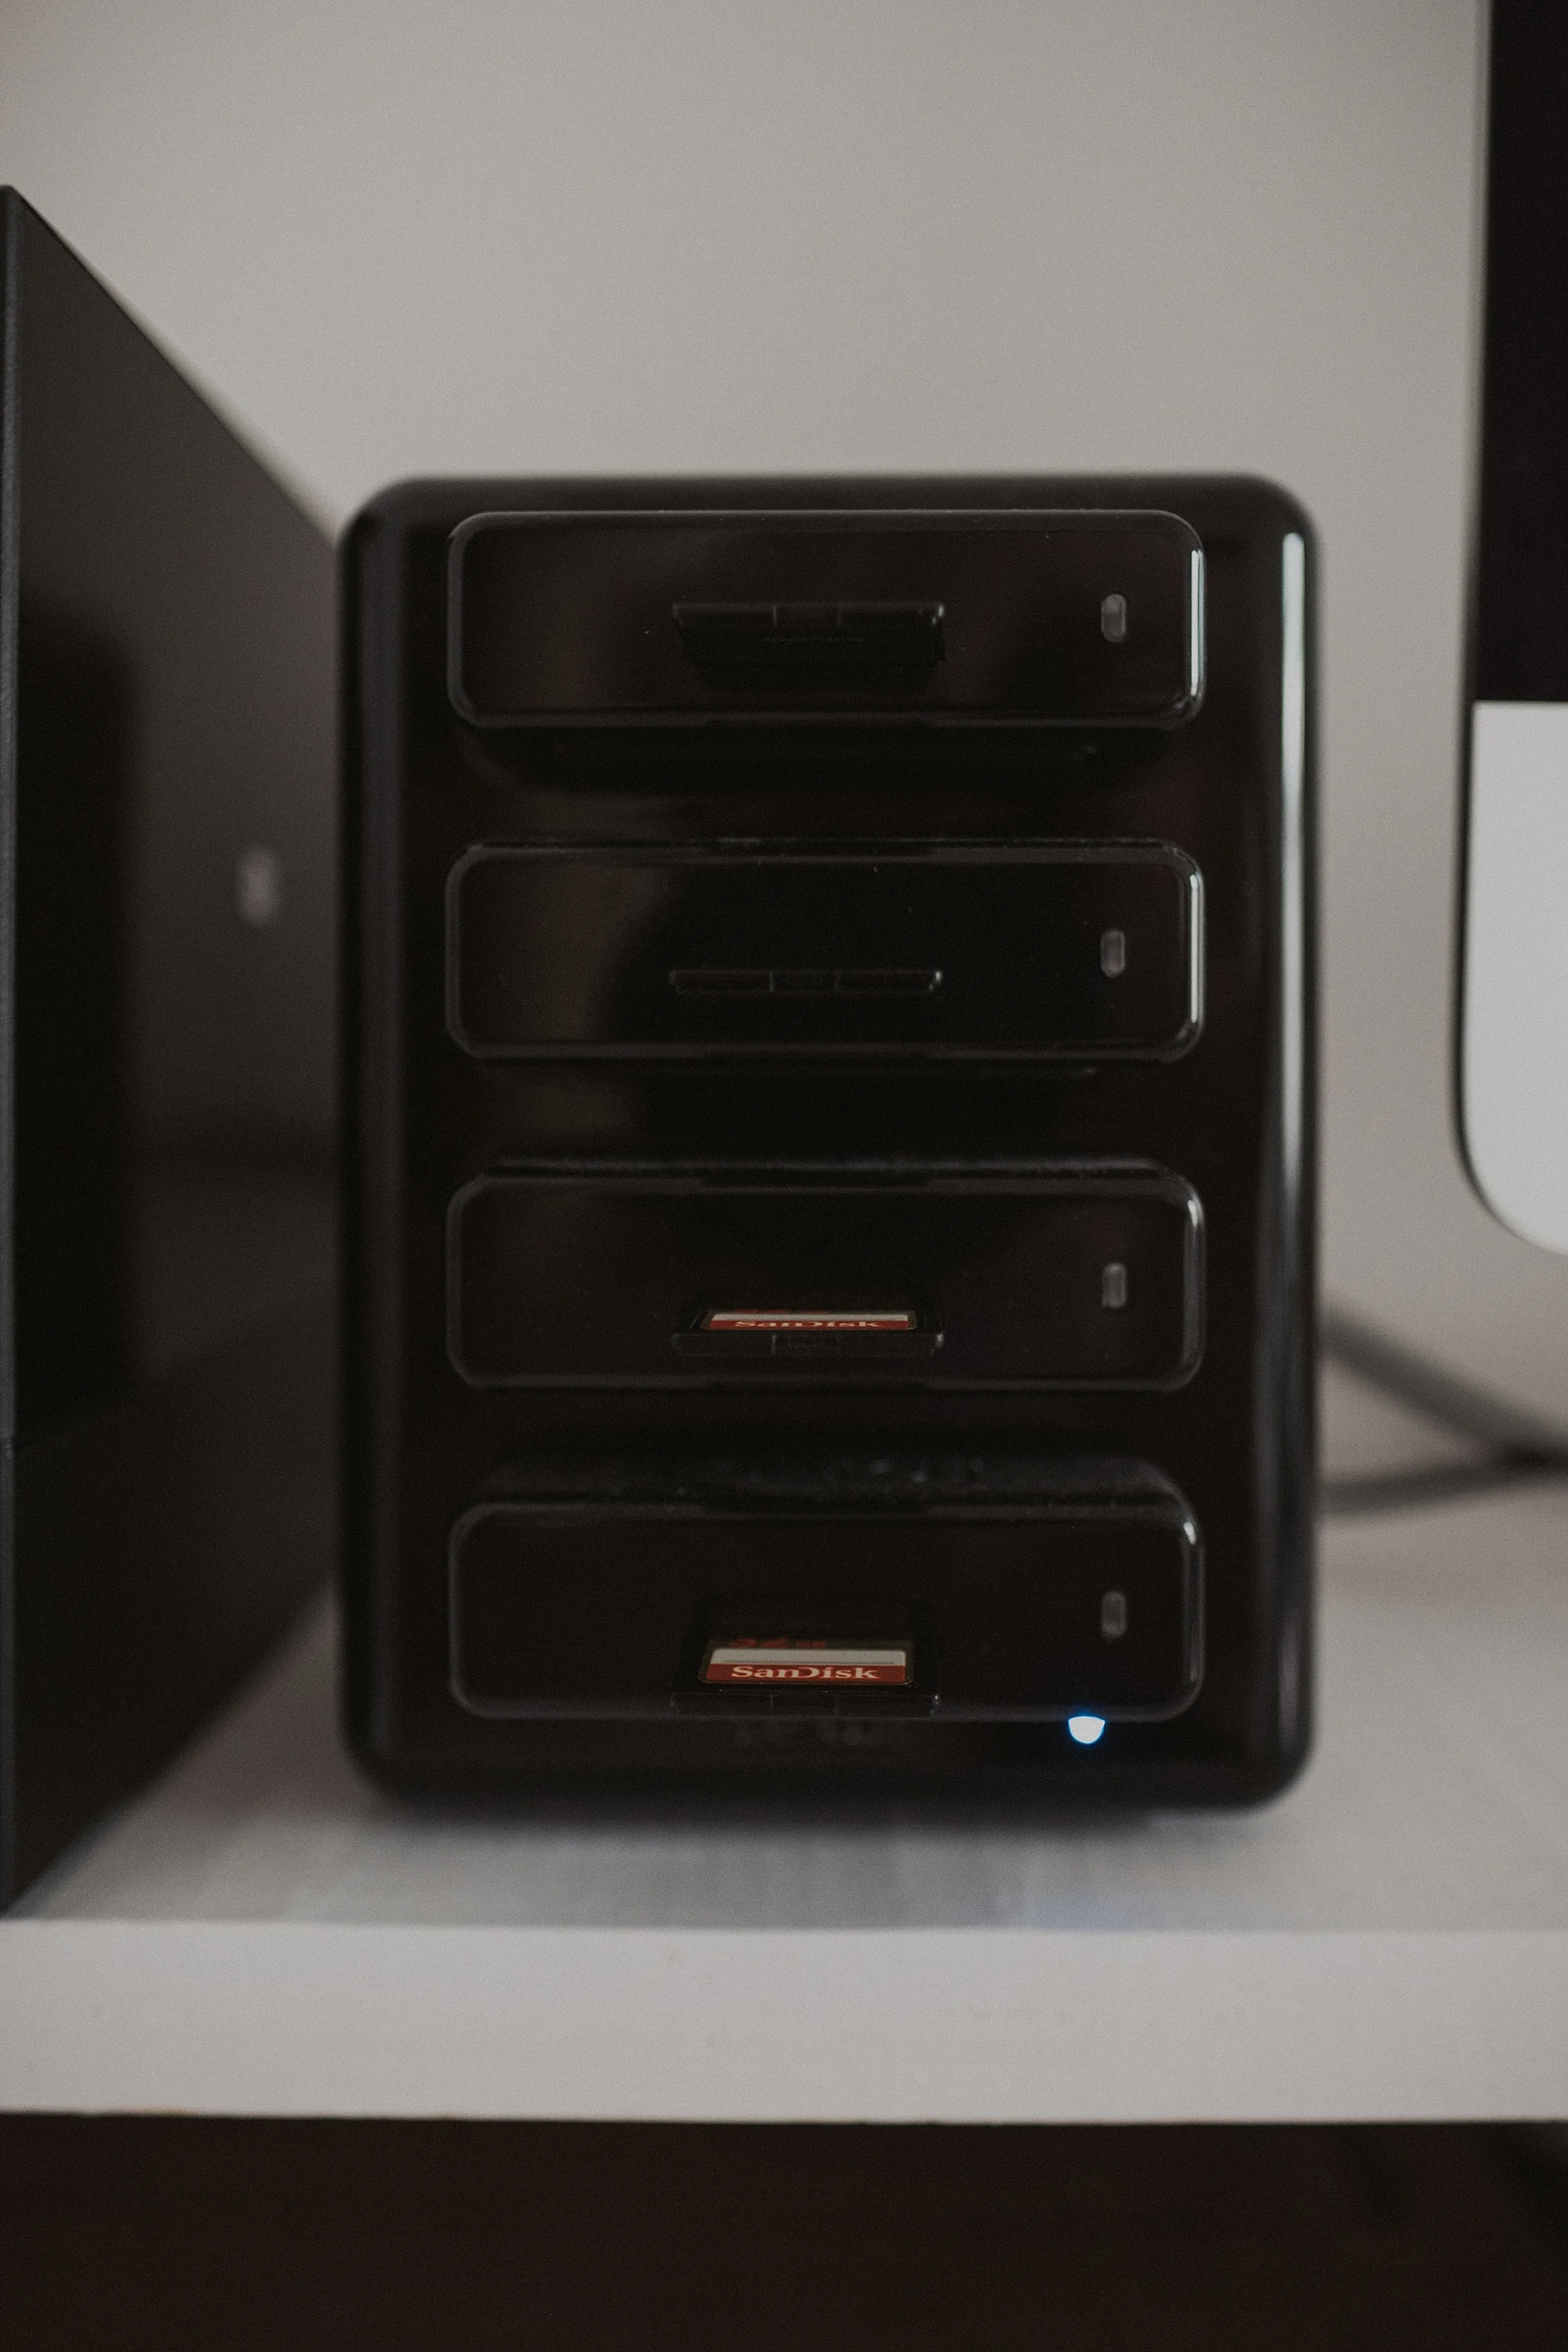
<- what it looks like with four cards plugged in to your drive.
How to ingest using Photo Mechanic:
1. First plug in your cards
2. Open Photo Mechanic
3. Hit filer, then ingest or hit command & G if you're all about keyboard commands.

4. In the dialog box select the cards you'd like to ingest.
5. Name your folder in the folder name box
6. Hit primary destination to select where you'll back the photos to, then hit open
6b. Optional, hit secondary destination for back up your photos to a second spot.

7. Hit ingest.

8. Go have fun with your friends, it'll take a little while for the process to finish.
Now
To sum up the system as quickly as possible, first ingest your SD cards somewhere onto your hard drive, then cull them and bring them into your Lightroom catalog, edit, export back on to your internal hard drive, upload to your SmugMug or Pic-Time, check that Time Machine is running (if you're paranoid) then go to sleep. Repeat.
if this made no sense, please let me know via email or by commenting on this post! I made it in hopes that one person finds use out of it!
Please stay tuned to this for useful (hopefully) posts that focus on bettering your life as a photographer.